The post HP Pavilion x360 Hard Drive Replacement appeared first on CRLDesigns.
]]>We received an HP Pavilion x360 laptop and the hard drive was failing the smart status check and would not boot most of the time. Luckily the hard drive is really easy to replace on this model and since the Windows install Key is embedded in the BIOS, we just replaced the drive, reinstalled windows and then replace the HP software and drivers.
The Repair
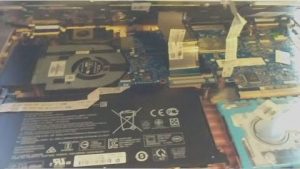 The removal and re-installation process is very straight forward. There are a few hidden screws on the bottom of the HP Pavilion x360 case, but if you watch the short tear-down video linked below it will show you the locations. All total there are only six screws you need to remove. Then use a sturdy pry tool that won’t damage the case and separate the two pieces. It takes some work to get it started but once you get one corner popped up, the rest comes up easily. Be cautious not to pull too hard on the cover, as there are two ribbon cables that will need to be removed before it comes off completely. Once the hard drive is replaced and everything is back together, you’ll need to install your Operating System. In most cases for most people this will be Windows 10 and that is what was preinstalled on this machine. Most laptops and desktops do not come with a license key sticker on the case any more as it is embedded into the BIOS from the factory. We were able to use Microsoft’s Media Creation tool, found at this link. Once downloaded and the boot files loaded onto a flash drive, simply insert into the laptop boot-up and follow the prompts like you would installing a fresh copy of Windows. It locates the key in the BIOS and installs and activates Windows. Afterward, we downloaded the HP utility program and let it search and install all of the missing drivers. Then the computer was back up and running like new again.
Overall in difficulty this is not a difficult repair. It takes some patience when using the pry tool to get the pieces apart, but otherwise everything is easy to accomplish.
I’ve included a short video of the case removal process for the HP Pavilion x360 if you’d like to follow along. And of course if you need help with anything at all, don’t hesitate to leave a comment or contact us. Also, feel free to subscribe to our YouTube Channel to see other videos. Thank you!
The post HP Pavilion x360 Hard Drive Replacement appeared first on CRLDesigns.
]]>The post HP Pavilion dv7-4087cl Hard Drive and Fan Replacement appeared first on CRLDesigns.
]]>We recently received an HP Pavilion dv7-4087cl laptop where the hard drive had gone out and would not boot and the owner also complained about the cooling fan needing to be replaced. The hard drive is really no issue as long as you have the Windows product key or license to reinstall the software and then replace the HP software and drivers. But the fan replacement is another matter. It unfortunately requires disassembling the entire laptop to remove the fan. Not to mention the fan is one of those harder to find pieces that took almost three weeks to get here from overseas.
The Repair
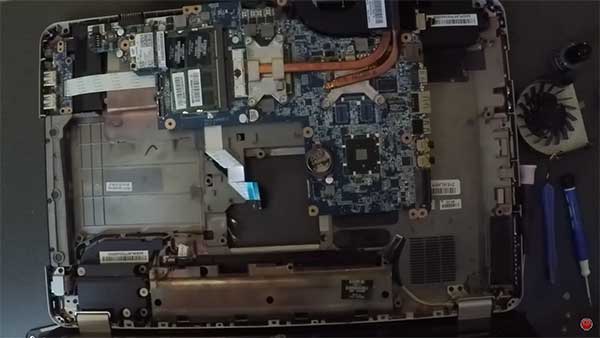
HP Pavilion dv7-4087cl
The removal and re-installation process is very straight forward. The thing to keep in mind is that you really have to take almost every piece apart to get the motherboard out in order to get to the tiny screws that hold the cooling fan in place. While I had everything apart I thought it would also be a good idea to clean and replace the thermal paste on the processor and graphics chip to make sure it was fresh and doing its job. Just be sure to disconnect the WIFI antennae wires as well as any ribbon cables before you start trying to remove too many pieces as you could tear or damage something in the process if you forget one.
Overall in difficulty this is not a difficult repair, just time consuming. I suggest not getting in a rush and keep up with all of you small parts and screws.
I’ve included a short video of the removal and re-installation process for the HP Pavilion dv7-4087cl if you’d like to follow along. And of course if you need help with anything at all, don’t hesitate to leave a comment or contact us. Also, feel free to subscribe to our YouTube Channel to see other videos. Thank you!
The post HP Pavilion dv7-4087cl Hard Drive and Fan Replacement appeared first on CRLDesigns.
]]>The post Alienware X51 motherboard replacement appeared first on CRLDesigns.
]]>We recently received an Alienware computer that would load Windows sometimes but more and more often would not get past the boot-up screen. It was beeping once a second and then refusing to load. After troubleshooting and testing all of the easy things, we narrowed it down to the motherboard with the aid of Dell’s beep code guides. The most difficult part of the Alienware X51 motherboard replacement was just getting one ordered and in from Hong Kong. It takes quite a while to get anything shipped from overseas.
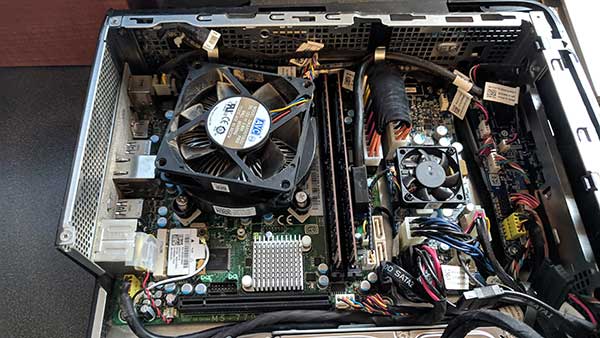
Alienware X51 Motherboard Replacement
The Repair
The removal and re-installation process is very straight forward. Simply remove the wiring and connectors. I like to snap a few quick pictures with my phone, just in case I need to refer to something quickly later on. You’ll need to remove the CPU fan and the back mounting plate from the old motherboard to transfer to the new one. It is held on with some strong adhesive, but I was able to slice it off with a flat blade. Then clean off old thermal paste and apply a fresh application. Seat everything back in its place and reconnect the wiring, making sure everything is firmly connected.
The most annoying part of the repair is getting it to boot into Windows again. This particular computer has Windows 8 installed on it. The new Alienware X51 motherboard replacement came with the boot settings different and needs to be updated. I changed the boot devices, and also boot mode from Legacy to UEFI. That still did not seem to work so I went back and turned secure boot mode on, and cleared the boot keys. It took a while for the computer to load completely into Windows, but it finally did. The last step is to reauthorize Windows 8. I connect to the internet and let it reauthorize, and everything is back up and running like normal again.
I’ve included a short video of the removal and re-installation process if you’d like to follow along. And of course if you need help with anything at all, don’t hesitate to leave a comment or contact us.
The post Alienware X51 motherboard replacement appeared first on CRLDesigns.
]]>